
Staircase Staining in Fonthill, Ontario: Why Proper Preparation Makes All the Difference
When homeowners in Fonthill, Pelham and throughout the Niagara Region decide to update their staircase, the first question is usually about colour.
What stain should we use?
Can we match the flooring?
Should the stairs be lighter or darker?
What type of clear coat will protect them?
Those are all important questions, but there is another part of the process that is often overlooked:
The preparation.
At Niagara Finish Pros, we believe the quality of a stained staircase is determined long before the first coat of stain is applied. A beautiful staircase finish starts with properly preparing the wood, carefully controlling the sanding process, removing every trace of contamination and making sure the surface is ready to accept the stain evenly.
This is especially important when working on high-end staircases in Fonthill, Pelham, Niagara-on-the-Lake and surrounding Niagara communities.
Staircase staining isn't just about applying stain
Stain is not paint.
Paint is designed to sit on top of a surface and create an opaque layer. Wood stain interacts with the wood itself, allowing the natural grain, variations and characteristics of the material to remain visible.
That is part of what makes stained hardwood stairs look so good — but it also means imperfections in the preparation can become very noticeable.
Uneven sanding can produce uneven colour.
Leftover finish can prevent stain from penetrating properly.
Scratches can become more visible once colour is applied.
Dust and contamination can affect the final finish.
In other words, staining tends to reveal preparation problems rather than hide them.
That's why our staircase staining process at Niagara Finish Pros puts so much emphasis on what happens before the stain ever reaches the wood.
Step 1: Assessing the existing staircase
Every staircase is different.
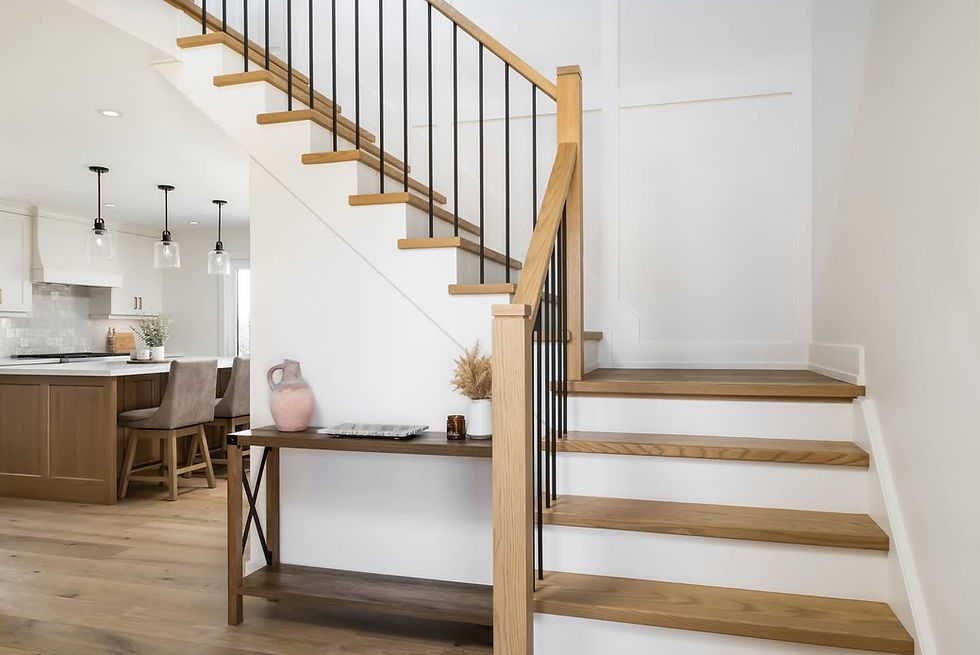
Before beginning a staircase refinishing project, we look at the existing condition of the treads, risers, stringers, nosings, handrail and other components that are going to be refinished.
We want to determine:
What type of wood are we working with?
Has the staircase previously been stained or clear coated?
Is the existing finish compatible with the planned refinishing process?
Are there scratches, dents, repairs or other imperfections?
Does the wood need to be taken completely back to bare wood?
What colour are we trying to achieve?
Does the new stain need to coordinate with existing flooring?
This assessment helps determine the appropriate preparation process instead of treating every staircase exactly the same.
Step 2: Protecting the surrounding home
Staircase refinishing takes place inside an occupied home, so protecting the surrounding areas is a major part of the job.
Before sanding begins, surrounding floors, walls and finished surfaces need to be properly protected.
The goal isn't simply to prevent dust from getting everywhere. It's also about protecting finished surfaces from sanding equipment, stain and clear coat during the project.
On a high-end home renovation, the staircase isn't an isolated piece of furniture. It's part of the finished interior, and the entire work area needs to be treated accordingly.
Step 3: The sanding process
This is where a significant amount of the craftsmanship happens.
Getting a staircase ready for stain isn't simply a matter of running a sander over the treads.
The existing finish may need to be removed, damaged areas may require additional attention and the wood needs to be progressively refined so that the final surface is consistent.
We carefully work through the staircase components, paying attention to areas such as:
Stair treads
Riser faces
Stair nosings
Handrails
Balusters
Stringers
Corners and detailed areas
The goal is to create a clean, consistent surface without leaving obvious sanding scratches or uneven areas.
This stage can be time-consuming, but it's one of the biggest reasons professional staircase refinishing looks different from a quick DIY stain job.
Why sanding matters so much when staining wood stairs
Imagine staining a piece of white oak.
The stain isn't simply creating a colour on top of the oak. The way the wood accepts the stain can change depending on how the surface has been prepared.
A section that has been sanded differently from the surrounding wood may absorb the stain differently. A small area where the previous finish wasn't completely removed can behave differently again.
Once the stain is applied, those differences can become extremely difficult to correct without going back through the entire process.
That's why we don't like to rush the preparation stage.
The stain should be the easy part. Getting the wood ready for it is where the real work happens.
Step 4: Removing dust and contaminants
Once the sanding process is complete, the staircase needs to be thoroughly cleaned.
Dust left behind on the surface can interfere with the stain and clear coat application. The wood needs to be clean and free from contaminants before finishing begins.
This is another area where preparation often gets underestimated.
A staircase can look clean to the naked eye and still have fine sanding dust sitting in the grain and surrounding work area.
Before moving forward, we take the necessary steps to ensure the surface is properly prepared for finishing.
Step 5: Testing the stain before committing to the staircase
One of the biggest mistakes homeowners can make is choosing a stain colour from a small sample and assuming it will look exactly the same on their staircase.
Wood species, grain, sanding and existing conditions can all influence the final appearance.
For that reason, testing is an important part of the process.
We can evaluate the selected colour on the actual wood and compare it with the home's flooring, cabinetry and surrounding finishes.
This becomes particularly important when homeowners are trying to create a seamless transition between a hardwood floor and a newly refinished staircase.
The goal isn't simply to find a colour that looks good on a sample.
The goal is to find a colour that looks right in your home.
Step 6: Applying premium Renner Wood Coatings
For many of our high-end staircase projects, we use Renner Wood Coatings, a premium professional wood-coating system.
Renner offers specialized waterborne stain systems and professional coating technologies designed for interior wood surfaces. Their systems also allow for customized stain colours, which can be particularly useful when we're trying to achieve a specific colour or match an existing floor.
We don't choose a coating simply because it is expensive or has a recognizable name.
The coating system needs to work with the wood, the desired appearance and the intended use of the staircase.
Step 7: Building the clear coat system
Once the stain has been applied and has achieved the desired appearance, the finishing process continues.
The clear coat is what provides the protective layer over the stained wood.
This is another reason we don't consider staircase staining to be simply "putting stain on the stairs."
A professional staircase refinishing project is a complete finishing system:
Preparation → Sanding → Colour → Drying → Clear Coat → Final Finish
Each stage affects the next.
The final clear coat needs to be applied properly and allowed to cure according to the coating system's requirements. Depending on the project and the selected Renner system, the exact application process can vary.
The objective is a smooth, consistent finish that protects the appearance of the stained wood while maintaining the look the homeowner wanted.
Why professional staircase staining is worth it
A staircase is one of the most noticeable architectural features inside many homes.
It is also one of the surfaces that receives some of the most daily use.
When a staircase is properly refinished, the difference isn't just the colour.
It's the consistency of the stain.
It's the smoothness of the wood.
It's the way the grain looks under the finish.
It's the transition between the staircase and the flooring.
And it's the attention to the small details that homeowners notice every time they walk through their home.
That's why at Niagara Finish Pros, we don't approach staircase staining as a quick painting job.
We approach it as a professional wood-finishing project.
Professional Staircase Staining in Fonthill and the Niagara Region
If you're considering staining or refinishing your staircase in Fonthill, Pelham, Niagara-on-the-Lake or anywhere in the Niagara Region, Niagara Finish Pros can help you determine the right approach for your staircase.
From the initial preparation and sanding through custom stain selection and the application of a professional clear coat system, our goal is to create a staircase that looks like it belongs in the home — not like it was simply stained after the fact.
We specialize in detailed interior wood finishing, including staircase staining, staircase refinishing, kitchen cabinet finishing and interior/exterior staining.
Thinking about refinishing your staircase? Contact Niagara Finish Pros to discuss your project and find out what is possible with your existing stairs.
Visit niagarafinishpros.com to learn more about our staircase staining and wood-finishing services in Fonthill, Pelham and the Niagara Region.


Comments